What is a Browse Abandonment flow?
The Browse Abandonment sequence aims to re-engage visitors who have viewed a product and left your webpage without making a purchase.
This flow is not one of the primary flows you’d usually create when setting up your Klaviyo (such as the welcome flow and abandoned cart flow).
That’s because, in terms of revenue per recipient (RPR), cart abandonment and welcome emails tend to have the highest returns.
However, Browse Abandonment can be a great tool to help you re-engage and remind customers about your products. And if done right, it can be a serious contributing factor to your revenue.
How do Browse Abandonment flows generate revenue, and how impactful can they be?
According to a study conducted by Google, 53% of shoppers always do research before purchasing to ensure they’re making the best choice.
The same study concluded that 87% of shoppers state getting a good deal is important when deciding which retailer to buy from.
Therefore, the Browse Abandonment flow is the perfect opportunity to benefit from those statistics.
By including the Browse Abandonment flow in your email strategy, you ensure leads are reminded about your products, and if an offer is included, their chance of choosing your brand gets even higher.
Here is how efficient the Browse Abandonment can be if you do everything right:
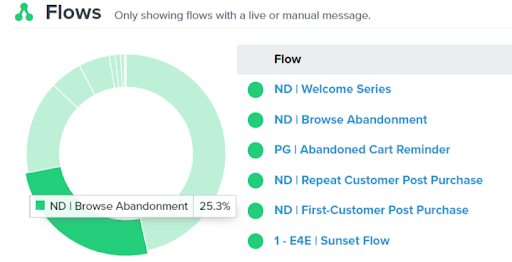
As you can see, the Browse Abandonment flow has the potential to be one of the top revenue drivers in your strategy.
How do I set up a Browse Abandonment flow in Klaviyo?
When setting up any flow, you need to consider three key elements:
- The trigger and its filters
- The time delays
- The emails themselves
First, you need to set the trigger to be a metric and choose the Viewed Product event.
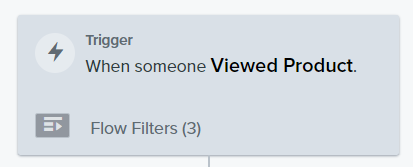
Then, add filters to make sure the flow does not overlap with other email sequences so that visitors will enter and exit the flow at the right time.
After you are done setting up the technical part, the next step is to assemble the flow.
You can use the drag-and-drop menu on the left to add emails and time delays, starting with the first email that will be sent at least 1 hour after someone views a product.
What should I include in the Browse Abandonment flow?
In general, the Browse Abandonment flow targets shoppers who are in the early stages of making a purchase, with the goal of reminding them of products they viewed and driving them back to your website.
There is a variety of email combinations that can help you achieve that.
But to determine what content to include, you need to consider your audience, your niche, your brand identity, and the offers you would like to include first. Once that is cleared out, you can start building your strategy.
Here are two sample strategies that you can apply in your Browse Abandonment Flow. Feel free to use them and tailor them to your brand’s needs.
Offer/Gift – based (Sample brand: Homeware)
Email #1 – A reminder of the viewed item
The first email in the Browse Abandonment flow will remind subscribers of the product they have been viewing and will give a slight nudge to give a second look at the product. Here, to create a sense of urgency, the emphasis could be on how fast the product usually gets out of stock.
Email #2 – Offer a discount for the item
The customer is offered a discount or other incentive (such as free shipping) for the product they’ve been viewing. The goal is to motivate them to make that purchase.
Email #3 – Last chance to get a discount
This email reminds people who still haven’t made a purchase about their discount and informs them that this is the last chance to use it before it expires. The aim is to create urgency for the customer to become eager to make that purchase.
Offer/Gift – based (Sample brand: Activewear)
Email #1 and Email #2 stay the same as the example above.
Email #3 – Introduce a better offer (for example, if your initial offer was 10% OFF, make it 15% OFF)
By creating a discount ladder in your strategy, you incentivize customers to make that purchase. After all, as the study above showed, 87% of shoppers want a good offer to decide whether they would buy from you.
Email #4 – Last Chance to get the item with a discount
Avoid doing this…
Not differentiating between Browse Abandonment flow and Abandoned Cart flow
If you are confused, customers will be even more confused once you start sending them the wrong emails.
These two flows serve different purposes. Hereof, the email content and target audiences would be different. You can read more about Abandoned Cart flows here.
Missing filters
It is vital to add the necessary filters when you are doing the technical setup of the Browse Abandonment flow.
If you miss the filters, you are risking sending emails to people who do not resonate with the email content anymore.
This can lead to people unsubscribing from your emails or reporting you as spam, resulting in damaged engagement.
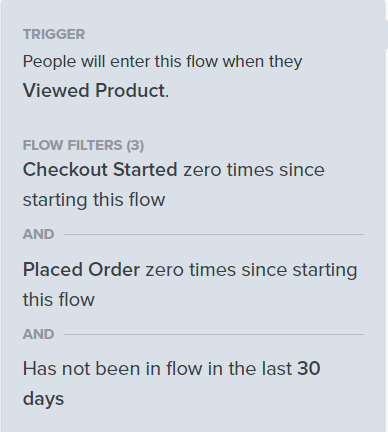
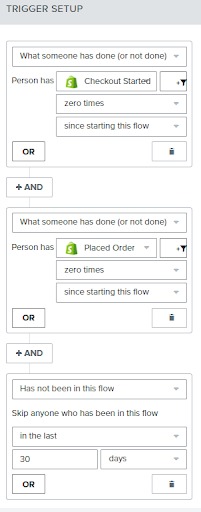
Here is a reminder of the filters you should include in this flow:
- Checkout started zero times since starting this flow
- Placed order zero times since starting this flow
- Has not been in the flow in the last 30 days
Not including a Browse Abandonment block
The core idea of the Browse Abandonment flow is to remind the customer of the item they’ve been viewing. But how would you do that if they can’t see that item?
Including this block allows customers not only to see but also to return to the viewed product with one click.
You can get this block from the pre-build Klaviyo template for browse abandonment flow.
All you need to do is add the block to your saved items and then insert it in the emails.
Or you can build one yourself. Click here to find out how to build it from scratch. This information can be useful, especially if you are using the new template editor, as it does not have the pre-build feature.
Conclusion
Now that you have become familiar with the browse abandonment flow basics, you are ready to set it up yourself.
Give it a try, and feel free to experiment with strategies that resonate with your brand.
If you have any questions or would simply like to share feedback, we would love to hear from you! You can contact us at office@progs.agency
If you’d like to know how to get the most out of your email automation, you can read more in our guide to flow optimization.